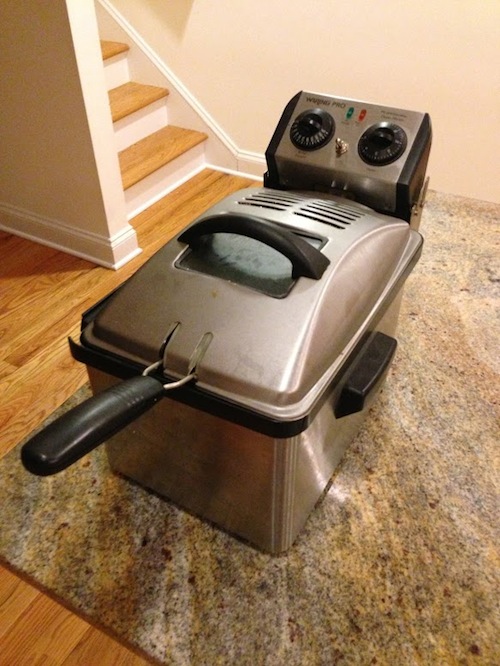
For a few months now, I’ve been using a $25 deep fryer I found at an estate sale to cook sous vide. It has a bit of a crack and is somewhat old, so I’d probably hesitate using it for real deep frying, but I wasn’t intending to deep fry with it anyway.
 This thing was definitely a steal for the price… though maybe not for someone who actually wanted to do some deep frying – you’d have to factor in potential medical bills.
It has a built-in thermocouple, has a nice metal basket with handle to pull the heated food out when done, and already has its own (powerful) heating element — essentially it has all the components necessary for a good sous vide machine. I even tested its temperature accuracy against a trustworthy thermometer and it came out pretty close. What could be better? (Spoiler alert: There is something much better.)
Well, one problem is that the lowest temperature setting on it was still rather high. 175 degrees F, its lowest setting, is higher than the temperature you would use to cook most food sous vide. While I’d be able to sterilize food in a reliable way, I can’t use this thing (or at least its built-in temperature regulation) to get the tender, moist results most people associate with sous vide. The food I produce from this setup closer resembles the output of more conventional cooking techniques.
One solution I could take was to buy an external temperature regulator that simply switched the power for the deep fryer on and off. This would mean that I would be able to use its basket and heating element, but just substitute out the thermoregulation.
However, I stumbled across this post on Seattle Food Geek and decided that building my own solution would be much more fun. Plus, since this build would be for an immersion circulator type of device instead of an all-in-one machine like the deep fryer (or the Sous Vide Supreme), I could use any size container and accommodate any amount of food.
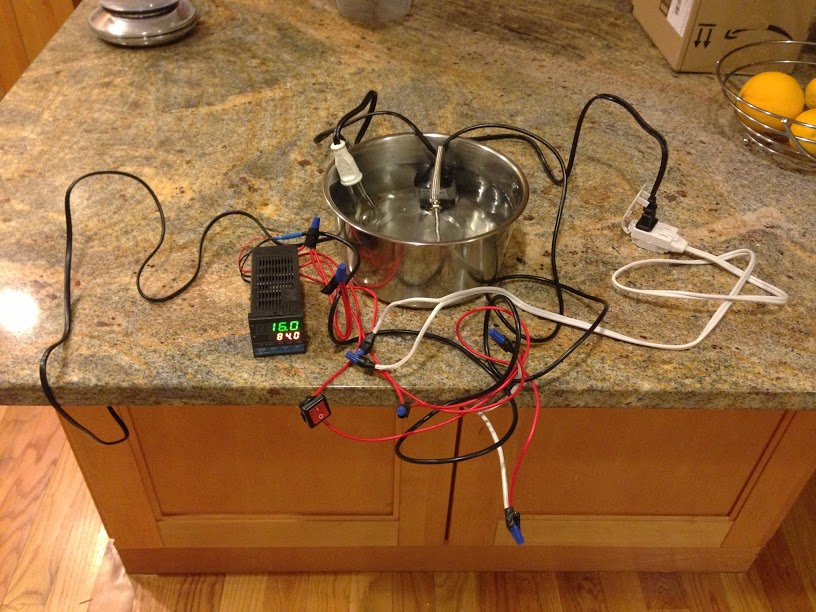
I essentially followed the instructions given on the site, though I made it modular (I plug in the heating element instead of having it built-in), and mine doesn’t look nearly as slick.
There is also an element of electrocution risk in mine, since although I soldered the connections well and topped them with lens caps, there’s still a fair amount of naked wire protruding (probably not good for an application that inherently involves being around a large amounts of water). I probably wouldn’t feel comfortable leaving it on overnight. Pictures and explanations below:
 Aquarium pump, needed to circulate the water. It should be on a separate circuit from the PID (temperature controller) since it needs to always be on, while the heating elements will be turned on and off based on the temperature.
 Immersion heater coil. I decided to not build this thing into my setup and instead have a plug for it, since these coils apparently burn out easily. My setup, unfortunately, can’t handle much more than one of these without itself burning out (the relay would blow up).
 Thermocouple. This is used to sense the temperature for the PID.
 Switch. My little conceit, since given how basic my setup is, I could just plug it in/pull the plug for on/off.
 The heart of the setup. The PID takes temperature information from the thermocouple and sends a signal to a relay to complete/break a circuit based on temperature. This model has its own electrical relay built-in. Somehow, Seattle Food Geek blog had a PID with an internal relay that could take three immersion heaters. Based on the electrical rating on mine… it can take basically one.
 How the setup works. Thermocouple senses temperature, the pump circulates water, and the heater raises the temperature as needed (turns off when temperature is reached or about to be reached).
 The aquarium pump (black plug) is meant to be separate from the PID-controlled circuit (white plug), since the pump needs to be always on, and the PID switches its circuit on and off based on temperature.
 Heater gets plugged into the PID-controlled circuit. I used a cut up extension cord to make this.
 The whole shebang.
I did think about using this setup to control my deep fryer, but quickly realized that the built-in relay in my PID is rated for voltage that is WAY lower. I would need to install a more robust external relay in order to actually be able to push the machine to be able to handle that kind of electrical throughput — at the moment, the PID is barely rated enough for more than one immersion heating element. Putting the external relay in would also require some rewiring to bypass the PID’s relay element, which is probably more than I want to do in the near term (I actually have the solid state relay I want to use already). For now, I’m pretty happy that I have something that will finally give me my perfectly cooked steaks, chicken, and anything else I want to toss into it.